ssp.karnataka.gov.in Verification & Approval Of Pre-Matric Scholarship Applications 2019-20 : State Scholarship Portal
| Want to comment on this post? Go to bottom of this page. |
|---|
Organisation : Karnataka State Government
Portal Name : State Scholarship Portal (SSP)
Facility Name : Verification & Approval Of Pre-Matric Scholarship Applications 2019-20
Applicable State : Karnataka
Website : https://ssp.karnataka.gov.in:8080/1920/
SSP Karnataka Verification & Approval Of Applications
Verification & Approval Of Pre-Matric Scholarship Applications 2019-20
Related / Similar Scholarship : SSP Pre-Matric Scholarship 2020-21
Steps :
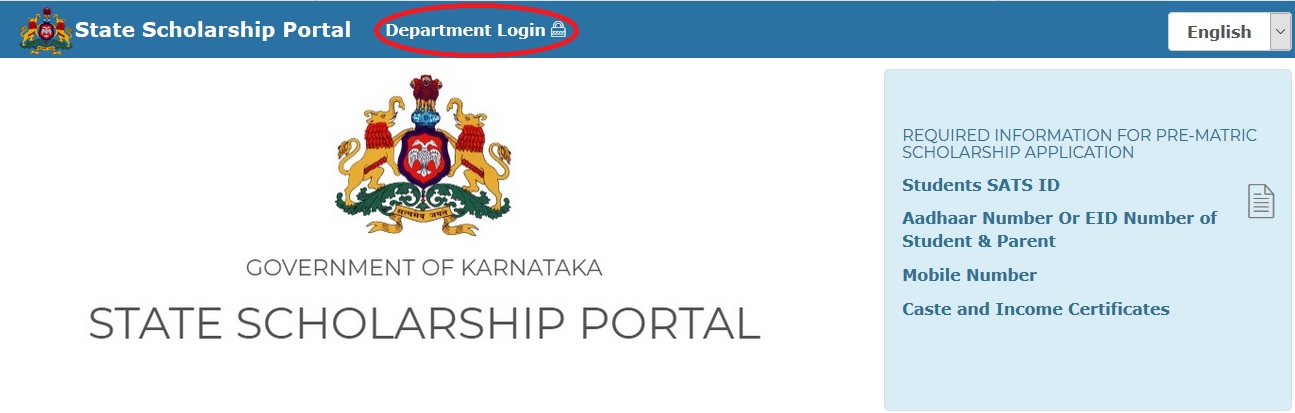
Step 1 : Go to website: https://ssp.karnataka.gov.in:8080/1920/
Step 2 : Click on the Department login on top of the screen.
Step 3 : Login page will be displayed,
** Select Department name – Department of Minority Welfare,
** Enter your Username and Password
** It will ask to enter ODP (ODP will be received (SMS) on BEOs registered mobile)
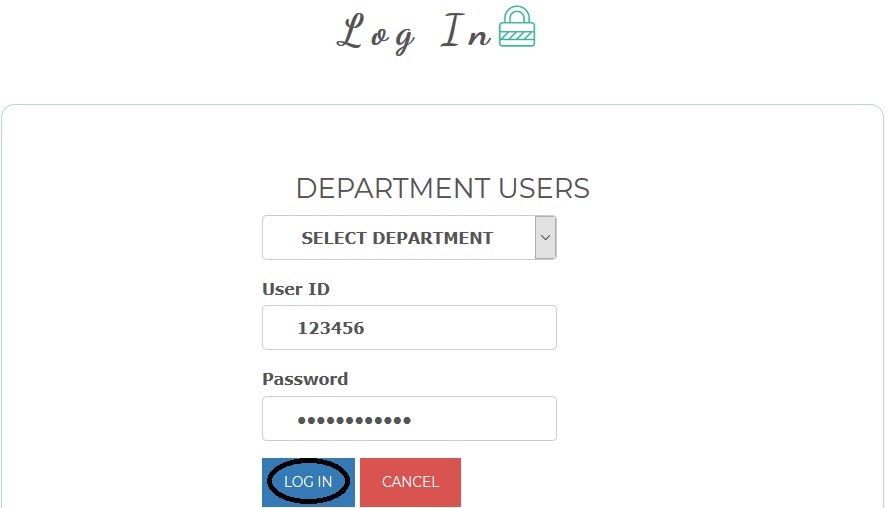
** Enter received ODP and click on submit button.
** ODP is One Day Password. It can be used for whole day to login.
** ODP will be changed for next day.
Step 4 : Scrutiny Home page will be displayed, this page contains 5 menu options they are,
** Home
** Processing
** Push To DBT Portal
** Report
** Profile
Step 5 : For Verification click on Processing menu, sub menu options under this menu will be displayed they are,
a) Verification (Stage-1)
1. Recommended for further Processing
2. Recommended for Rejection
b) Approval Process (Stage-2)
1. Recommended for Sanction
2. Recommended for Verification
3. Recommended for Rejection
c) Edit Aadhar details
d) Edit SATS Name / Mobile No.
Step 6 : Click on Verification (Stage-1) menu, two sub menu options will be displayed under this verification option they are,
** Recommended for further Processing
** Recommended for Rejection
Verification Process
Stage – 1 :
Recommended for further Processing
Before starting verification, process read the following instructions –
** In the list displayed, it is required to check Income, Marks, Religion and Domicile as per eligible guidelines.
** This list also contains some students’ name mismatches in SATS name and NSP name.
** You must approve all eligible applications and also you can reject the applications if you find students SATS name and NSP name is completely different under this process.
** For verification marking of the following checkboxes are compulsory,
1) “To be further processed”
2) “Received Physical Consent form for the use of Aadhaar Received”
3) “Declaration”
** “Received Physical Consent form for the use of Aadhaar Received” – This option is a certification for having collected physical consent forms from students. Without this option you cannot approve the application.
Step 7 : Click on Recommended for further processing, here students applications recommended for further processing list will be displayed. Here you can filter the applications based on School-wise and Gender-wise.
Step 8 : For approval of eligible applications,
** Click on “To be further processed” checkbox. (These checkboxes are auto selected no need to select again)
** Click on “Received Physical Consent form for the use of Aadhaar Received” Checkbox. (This option is a certification for having collected physical consent forms from students)
** Click on declaration checkbox which is showing above submit button.
** Click on Submit button.
For rejection of applications under this process,
** Click on “Reject” checkbox, rejection reason will be displayed.
** Select the reason for rejection from dropdown list. (NSP ID does not belongs to the student)
** Click on “Received Physical Consent form for the use of Aadhaar Received” Checkbox. (This option is a certification for having collected physical consent forms from students)
** Click on declaration checkbox which is showing above submit button.
** Click on Submit button.
Recommended for Rejection
Step 9 : Click on Recommended for Rejection, then students’ applications recommended for rejection list will be displayed.
Here you can filter the applications based on
** Family Income exceeds the specified limit.
** Grade is below the specified Grade i.e. below ‘B’ Grade.
** NSP – SATS Name do not match
Step 10 : For rejection of applications,
** Click on “Reject” checkbox. (These checkboxes are auto selected no need to select again)
** Click on “Received Physical Consent form for the use of Aadhaar Received” Checkbox. (This option is a certification for having collected physical consent forms from students)
** Click on declaration checkbox which is showing above submit button.
** Click on Submit button.
For approval of applications under this process (if you find any student eligible),
** Click on “To be further processed” checkbox, approval reason will be displayed.
** Select the reason for approval from dropdown list. (NSP ID belongs to the student)
** Click on “Received Physical Consent form for the use of Aadhaar Received” Checkbox. (This option is a certification for having collected physical consent forms from students)
** Click on declaration checkbox which is showing above submit button.
** Click on Submit button.
User Manual :
https://www.scholarships.net.in/uploads/pdf2020/44080-UM.pdf
Approval Process
Stage – 2 :
Step 11 : Click on Processing menu and click on Approval Process option.
** A statistics of applications will be displayed, which contains 3 cases
i. “Recommended for Sanction”,
ii. “Recommended for Verification”
iii. “Recommended for Rejection”
(Along with statistics of applications that are approved, rejected & pending within each case)
** Verified applications (from stage-1) will be segregated into 3 cases
1) Recommended for sanction,
2) Recommended for verification
3) Recommended for rejection
Application are segregated based on ‘name matching score of student’ as in SATS, Caste & Income Certificates.
** Here you can approve the applications for sanction and also can reject the applications from the above 3 case.
** Once you approve/reject the applications here, there is no option to re-verify the applications.
Recommended for Sanction
Step 12 : Click on Recommended for Sanction option,
Step 13 : Select scheme Pre-Matric scheme from drop-down list, list of students recommended for sanction will be displayed.
** This list is 100% matched data.
** Names as in SATS, Income & Caste certificates are matched completely under this process.
** You can approve the applications for sanction.
** You can reject applications, wherein SATS name is completely different with Income and Caste certificates.
Step 14 : For approval of applications,
** Click on Approve checkbox. (These checkboxes are auto selected no need to select again) and click on submit button.
For rejection of applications,
** Click on “Reject” checkbox, rejection reason will be displayed.
** Select appropriate rejection reason/s from the drop-down list.
i. Name as in Income Certificate & SATS name not matched
ii. Name as in Caste Certificate & SATS name not matched
** Click on Submit button
Recommended for Verification
Step 15 : Click on Recommended for verification option.
Step 16 : Select scheme Pre-Matric scheme from drop-down list, list of students recommended for verification will be displayed.
** This list is partially matched data.
** Names as in SATS, Income & Caste certificates are matched partially under this process.
** You can approve the applications, if student’s SATS name matches with Income and Caste certificates name with little variation in spelling.
** You can reject applications, if SATS name is completely different from Income and Caste certificates name.
Step 17 : For approval of applications,
** Click on Approve checkbox, approval reason will be displayed.
** Select the reason for approval of applications from the dropdown list.
i. Name as in Income Certificate & SATS is matched
ii. Name as in Caste Certificate & SATS is matched
** Click on submit button.
For Rejection of applications,
** Click on “Reject” checkbox, rejection reason will be displayed.
** Select appropriate rejection reason/s from the drop-down list.
i. Name as in Income Certificate & SATS not matched
ii. Name as in Caste Certificate & SATS not matched
** Click on Submit button
Recommended for Rejection
Step 18 : Click on Recommended for rejection option.
Step 19 : Select scheme Pre-Matric scheme from drop-down list, list of students recommended for rejection will be displayed.
** This list is below 20% matched data.
** Names as in SATS, Income & Caste certificates does not match under this process.
** You can approve the applications, if student’s SATS name matches with Income and Caste certificates name with little variation in spelling.
** You can reject applications, if SATS name is completely different from Income and Caste certificates name.
Step 17 : For approval of applications,
** Click on Approve checkbox, approval reason will be displayed.
** Select the reason for approval of application from the dropdown list.
i. Name as in Income Certificate & SATS name is matched
ii. Name as in Caste Certificate & SATS name is matched
** Click on submit button.
For Rejection of applications,
** Click on “Reject” checkbox, (These checkboxes are auto selected no need to select again).
** Click on Submit button
Please show my result
Please show my result